Thursday, January 14, 2016

Stone Painting • Incorporate nature into your home!


Rocks are a lovely way to give your room, dorm, apartment, or home a fun boho vibe! With these easy creations you can have a new look in no time at all!


Start off with several smooth rocks. You can vary the color if you would like! Then get painting! I used a sharpie paint pen to complete my designs. You can use a white or black paint pen depending on the color of your rock.


There you go! 

Remember crafters, be crazy!
xxx,
Zaria 

Friday, December 18, 2015

Tin Can Succulents • The cutest pot you'll ever see!


The only thing more "in" than tin cans is succulents. With these mini creations, you'll have the cutest pots around! 


Start out with some tin cans. I washed out old black bean cans for this project, but any cans will work great!

For my first succulent pot, I started by painting the tin can. I like to mix my own paint colors, check out my tutorial here. 


I used hot glue to attach lace and twine to the can. I got this lace from an old skirt I cut up. You can use any sort of lace or ribbon you can find! 

Just glue the edges of the lace (under the seams) to make sure the hot glue doesn't show!


For my second pot, I decided to cover it with fabric. I used a different part of the skirt I cut for the lace. Again, I used hot glue to attach the fabric to the can. I finished the design up with more twine!


I used cactus and succulent potting soil to fill up my pots and plant my little succulents


For my third can, I created a lantern using a simple hammer and nail. You're more than welcome to use a drill gun instead! 


Start by using a permanent pen to mark where you want to make your holes. Permanent marker can be removed from the tin can by using nail polish so it's no big deal if you mess up and want to start over!


Then use the hammer and nail (or drill gun) to poke holes in the can. You can also poke one hole in each side and attach wire to create a handle. I used floral wire wrapped around itself.


Paint the can and put a candle in the lantern and you're good to go!


Tin cans are the new mason jars so make sure you're up to date with the cutest tin can crafts!


Remember crafters, be crazy!
xxx,
Zaria 

Tuesday, December 15, 2015

Sorority Canvases • Spoil your little in style!


What sorority girl doesn't love to craft? Okay, a lot of them. That's why these cute and easy canvases are the perfect inspiration to sit down and get painting. 

Canvases come in many sizes and are cheap to buy as well! For paint, I like to mix my own from primary colors. It's cheap, easy, and really fun. Check out my paint mixing tutorial here!

I invested in paint pens for these canvas. They are a little more expensive ($4-5) but totally worth it! They really make a difference in the appearance of the canvas and make it much easier for you!


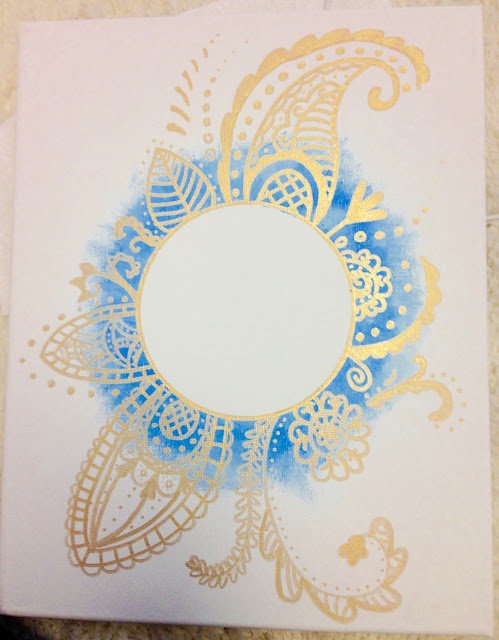
To achieve this look on a canvas start by tracing a circle from a cup or other round object in pencil. Then dampen a paper towel (very lightly, DO NOT make it too wet) and dip it in paint. Use your finger to make outward strokes with the paper towel away from the circle. Voila! Finish it off by retracing the original circle, this time with a paint pen.


This "watercolor" effect looks beautiful under designs or on it's own!

My main advice for intricate canvases is to take your time! It will look better in the end, trust me!


There you go! Here are three beautiful canvases to inspire you to get crafting!

Remember crafters, be crazy!
xxx,
Zaria 

Sunday, September 6, 2015

Mini Donut Canvases • Wake up with a smile!


Who doesn't love donuts? This sweet craft is perfect for your kitchen or dorm room and will add fun and color wherever you put them! 


Mini canvases are perfect for this craft, but regular canvases could be just as cute! I bought three mini canvases for $1 each! Q-tips are your best friend in this craft and serve as the perfect tiny paintbrush!


I love mixing my own paint from basic colors, it saves money and is fun to do! Check out my paint mixing tutorial here! 


Paint pens are super useful in this craft too! The sprinkles and lettering were made easy by paint pens. 


My first step was tracing the outer circle of the donut on the canvases. I traced the bottom of a paint bottle with pencil and then used a Q-tip to cover it with paint. Then, using the frosting color, I made a smaller circle in the center. I used a Q-tip to fill in the donut. I found it was easier to draw semicircles to create the pattern of frosting. For the sprinkles, I used a white paint pen first and then filled in the shape with color. Using the sharpie pen for icing works great as well!


There you go! A cheap easy tutorial that will enhance any room!

Remember crafters, be crazy!
xxx,
Zaria

Monday, August 10, 2015

Floral Letters Round 2 • Bring life to any room!


Elegance has never been more easy! These gorgeous floral letters are perfect for any room in your house and make a great personalized gift for a friend! Plus they are cheap and simple to make. 


I bought simple sturdy letters from my craft store, they were on sale and only cost about $2. You can find tons of sizes and materials, so feel free to adjust the tutorial to fit your needs (for example, thick wooden letters would make great bookends). 


I also bought an assortment of fake flowers (also on sale). My suggestion is to choose one larger "feature" flower, two or three bunches of smaller flowers, and then a very small and simple "filler" flower. You can also use the leaves (as shown below) for a unique look!


I pulled and cut the flowers off their stems. You are going to hot glue the flowers to the letters, so you need to cut off the stem completely in order for the flowers to lay flat. Then, I laid the cut flowers on the letters and used my glue gun to secure them into position.


As you can see, there are an infinite amount of options when it comes to colors, flowers, and styles! Have fun and go a little wild!

Remember crafters, be crazy!
xxx,
Zaria