Monday, June 15, 2015

The Ultimate Yard Sale • Get some cash for your old stuff


The only thing better than saving money is making money! Selling your old stuff is a fun and easy way to make some extra cash! My friend Emerald and I decided to throw a picture perfect yard sale to clean out our closets and replenish our bank accounts. 


The key to any good yard sale is obviously customers. And how do you get customers? Publicity!
We made adorable flyers printed on color paper and put them all around the neighborhood. Placing an ad on craigslist is also a free way to draw in a lot of customers! Feel free to use this JPEG to make your own flyers!


We also made a larger sign with cut out letters for the actual sale!


We used tables and blankets to display our "merchandise." Emerald also had a clothing rack that was perfect for hanging our favorite items!


A Tip: People will buy your miscellaneous things you think no one will ever want! Put them out to sell and see what happens! Worse comes to worse no one buys it, but it can't hurt to try!


We drove all the things we didn't sell over to Goodwill at the end of the day. Donate useful things instead of just throwing them away (unless it really is trash, in which case, toss it)!


Yard sales are fun and easy! Grab a friend, make some flyers, and throw the cutest yard sale you can!

Remember crafters, be crazy!
xxx,
Zaria

Friday, June 12, 2015

Glass Jar Labels • Rock your coffee in style


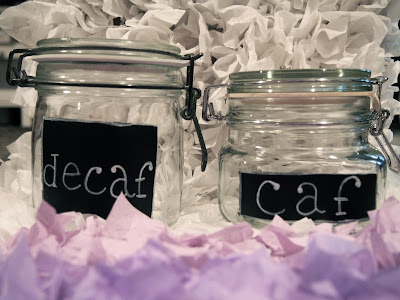
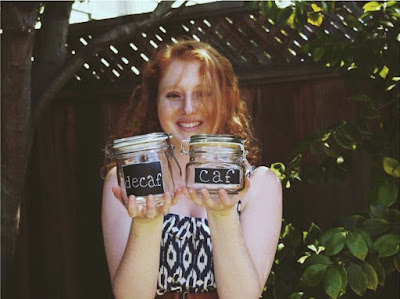
Who doesn't love glass jars? Who?! They're perfect for holding anything - especially coffee grounds! I decided to paint cute labels on the jars to help distinguish the "decaf" from the "caf." This same tutorial can work for labeling jars holding fruit or just about anything! 


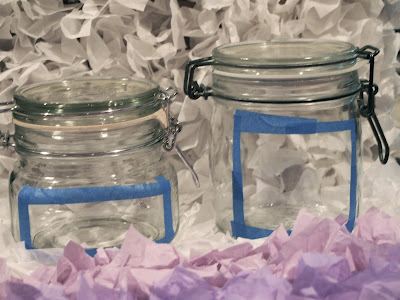
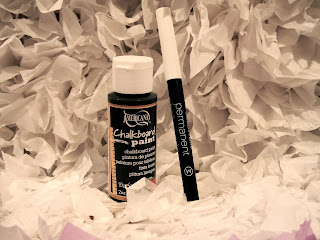
The first thing that I did was tape a square of blue tape on the jars and fill them in with chalkboard paint. What works best is to paint the jars layer by layer. Use a hair dryer to dry each round of paint before adding more.


The next step is to use chalk (or a permanent chalk marker, yes, it's a thing, yes, it's great) to label your jars! And thats it! Incredibly easy and simple!


And that's it! Easy, simple, and adorable!!

Remember crafters, be crazy!
xxx,
Zaria

Wednesday, June 10, 2015

Wrapping Presents • The perfect package


Gift wrapping is a huge piece of any present! It's so easy and doesn't require expensive wrapping paper or ribbon. You can wrap presents with basic things around your house!


I wrapped four separate presents, all with items I had laying around (if you don't own twine, are you really a crazy crafter?).

The first gift I wrapped is very basic and simple. I wrapped the present with newspaper and then cut 2 stripes from a paper bag and tied twine around the whole thing!


I wrapped the next package with newspaper again, but this time I splattered some paint on the paper first! Then, I did the same thing with the brown paper bag and twine! 


For the third present, I went straight for the paper bag. I wrapped the present with the bag and then cut stripes from plain white paper. I took a ruler and marker to the stripes and added some lines! You can add any (or no) design to the paper, or even choose pretty scrapbook paper to start! I finished it off with the twine!


The last wrapping is beautiful but slightly more complicated! The wrapping is made from paper towels died with food coloring. I wet the paper towel, then wrung it out so it was only slightly damp. After, I dropped some food coloring on it and wet it again. I continued the wet, wring, dye, wring, repeat process until I liked the amount of "water color" on the paper towel. I did it about 2 times. I then used a hair dryer to dry the towel. The layers of paper towel might separate but as long as you hold them together, they should be fine. When you're done, wrap the present, add the paper bag stripes, and finish it off with twine!


These easy wrapping ideas should keep you inspired and remind you that you never have an excuse to not wrap a present!


Remember crafters, be crazy!
xxx,
Zaria

Sunday, June 7, 2015

Party Perfect • The sparkle tea party you will never forget!


Throwing the perfect party is easy if you're willing to craft. For my friend's 20th birthday, I decided to throw her a Pinterest perfect sparkle tea party!


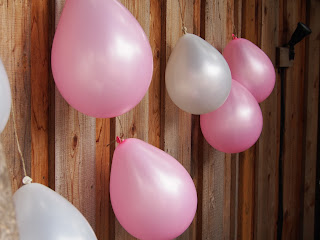
Let's start with the tea (obviously): For the party, we decided to make a tea corner complete with flying tea cups and floating balloons!


Twine is really going to be your best friend throughout this entire party! In a money saving maneuver, I decided to simply blow up the balloons on my own (instead of using helium) and hang them from the fence. 


As for the teacups, I went to Goodwill and got a few for $1. I spray painted them and dipped them in glitter. I hung the dried teacups from a tree (with the twine of course)!


Step two: The food! We stuck with the tea theme and ate tea sandwiches, petit fours, and cucumber slices. The cuter, the tinier, the better! 


For the table decorations, I used tablecloths and tissue paper. I used cream and sugar containers as vases for flowers!


The surrounding decor: I made a banner from twine and basic paper. I just cut the paper in triangles and fastened the pieces together with twine.


And the final part: the cake! I made a naked cake complete with flowers!


Now go light the candles and have a yourself a Pinterest perfect party!


Remember crafters, be crazy!
xxx,
Zaria